|
Infomation. |
What's SVG Ordinals?
|
||
What's Recursion?
|
||
|
First, prepare an SVG file drawn in vector.
Be careful not to mix in raster images. |
||
Step.1
Create Project For 'Height/Width', specify the size of the image to be created. For 'Website URL', you must set the URL for the Mint site. 'Unisat API' is optional; however, if a shared API key is used, there is a risk of reaching the access limit. |
||
Step.2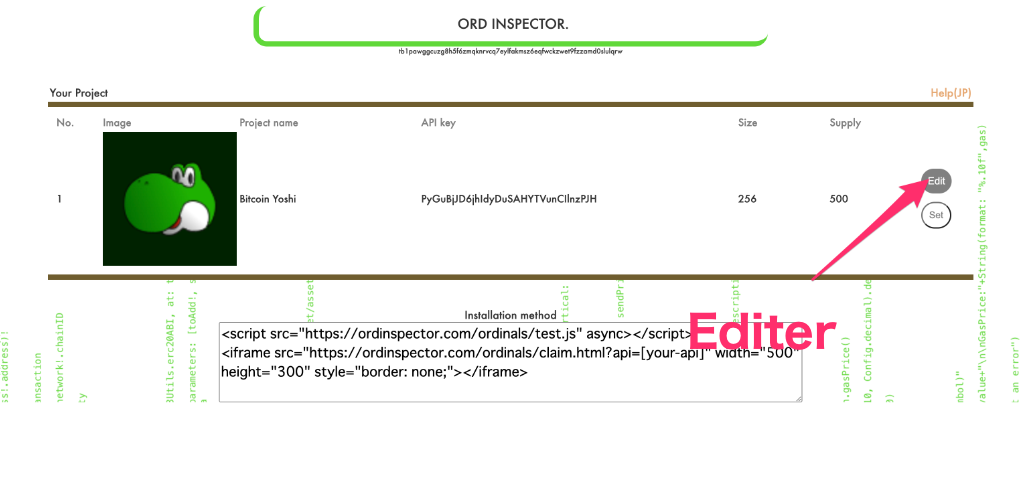
Go to editer To update the basic information of the project, please press the "Set" button. To open the Editor, press the "Edit" button. |
||
Step.3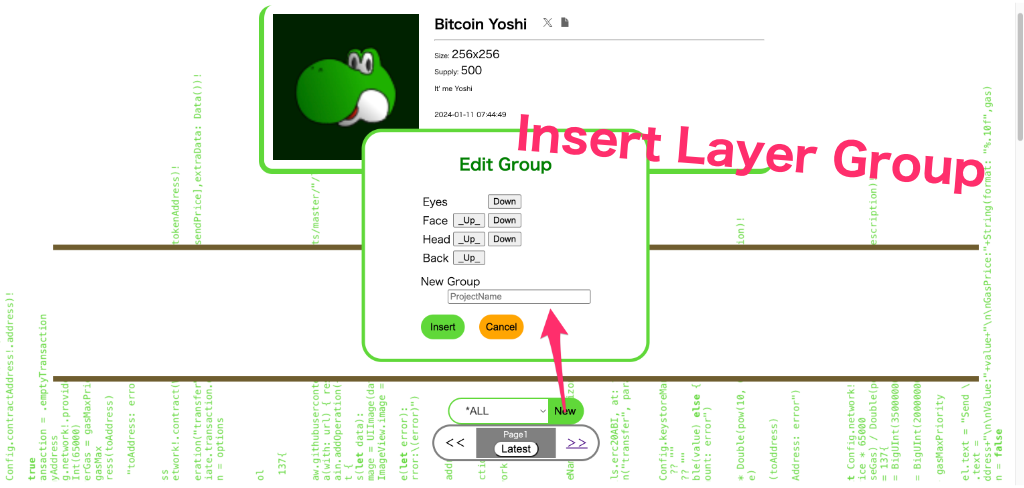
Insert Layer Group Please insert the layers of parts suitable for your project. The depth of the parts can be changed with the Up/Down buttons. |
||
Step.4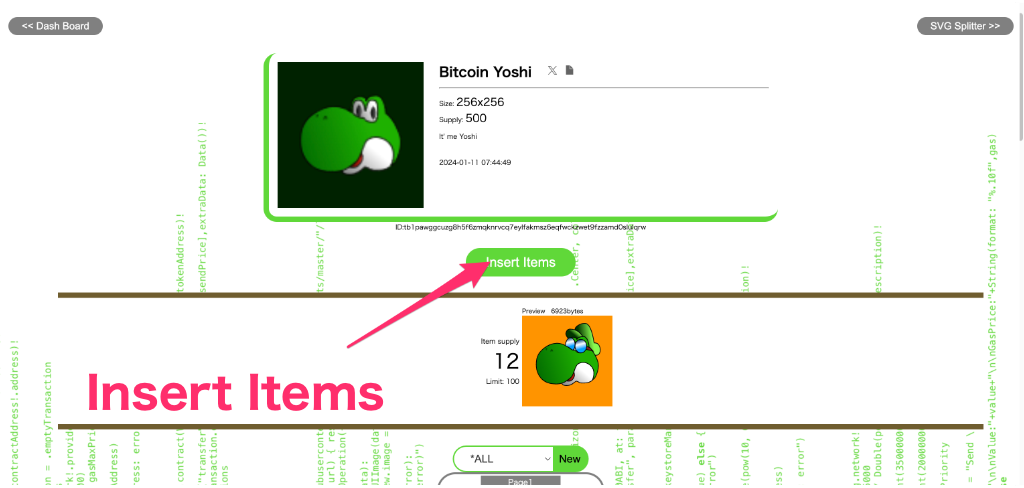
Go to Insert Item Upload the SVG file you have prepared in advance. |
||
Step.5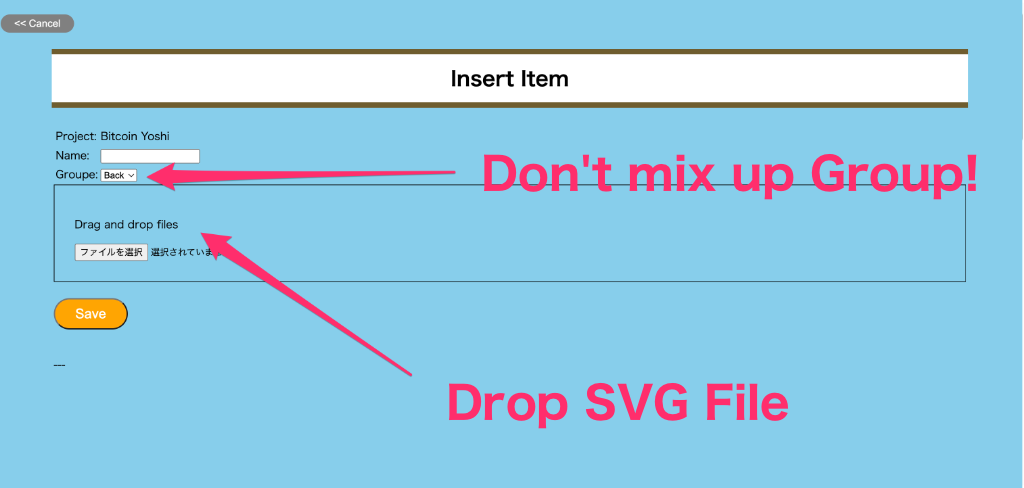
Insert Item Upload each part one by one. Please drop the file into the Drop area. Be careful not to mistakenly insert it into the wrong group. |
||
Step.6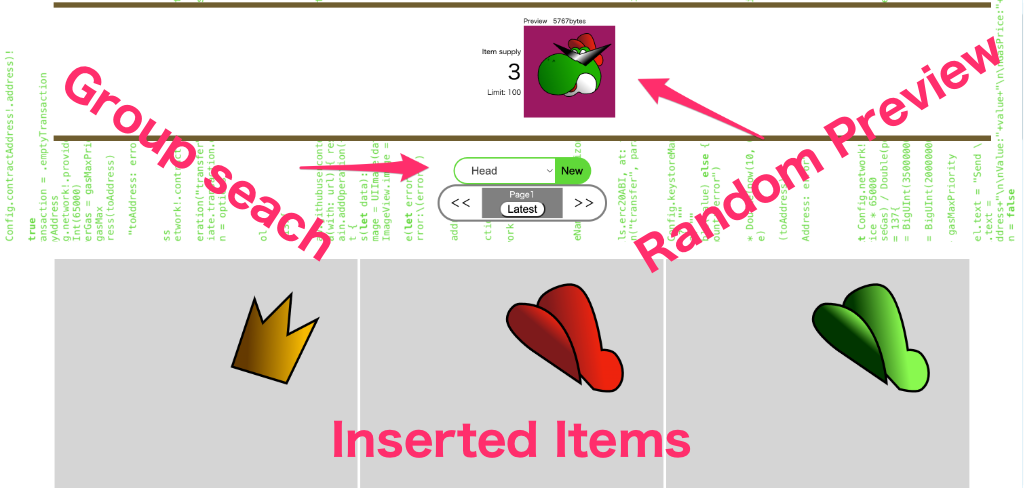
Check Items Once the insertion is complete, the images will be displayed in a list. You can search by group. Additionally, you can view a preview of randomly layered parts. |
||
Step.7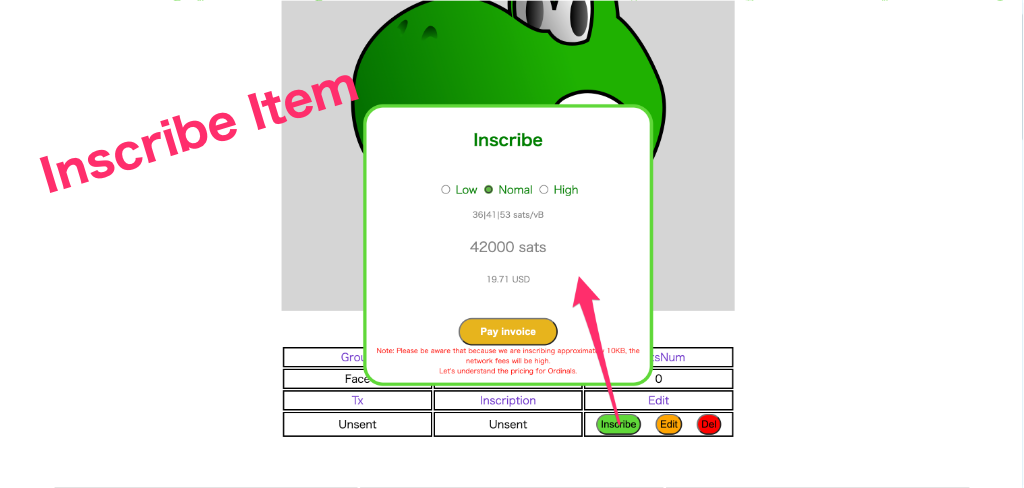
Inscribe Once all the items are uploaded, inscribe all the parts onto Ordinals. It is recommended to do this during times when the gas fees are relatively low, as this process incurs gas costs. |
||
Step.8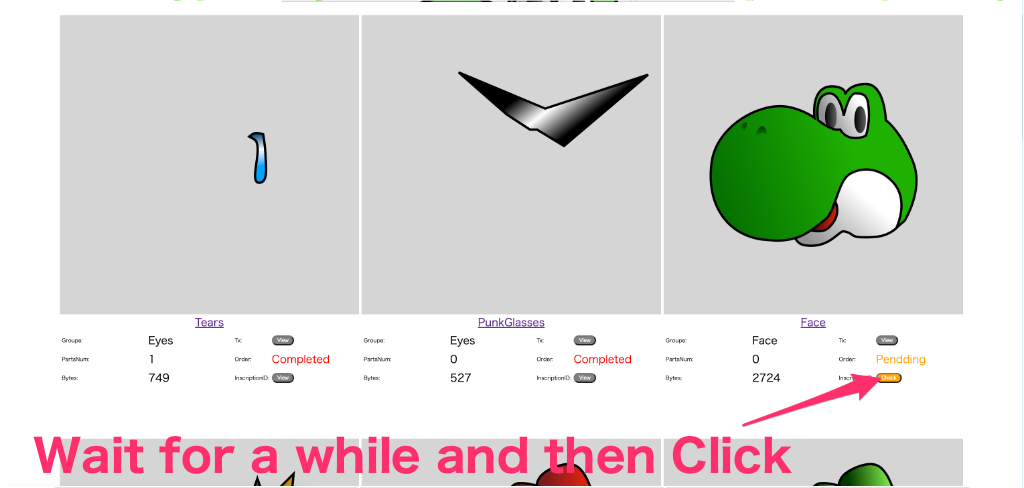
Check After the inscribing is finished, wait for some time and then press the "Check" button. It's complete when the "Order" status changes to Completed. You can check the progress of the transaction by pressing the "View" button. |
||
Step.9
Website Finally, copy the code and replace [your-api] with your project's API key to complete your mint site. Please be aware that due to provider or server security settings, it may not function in some cases. |
||
|
How to SVG Splitter |
||
Step.1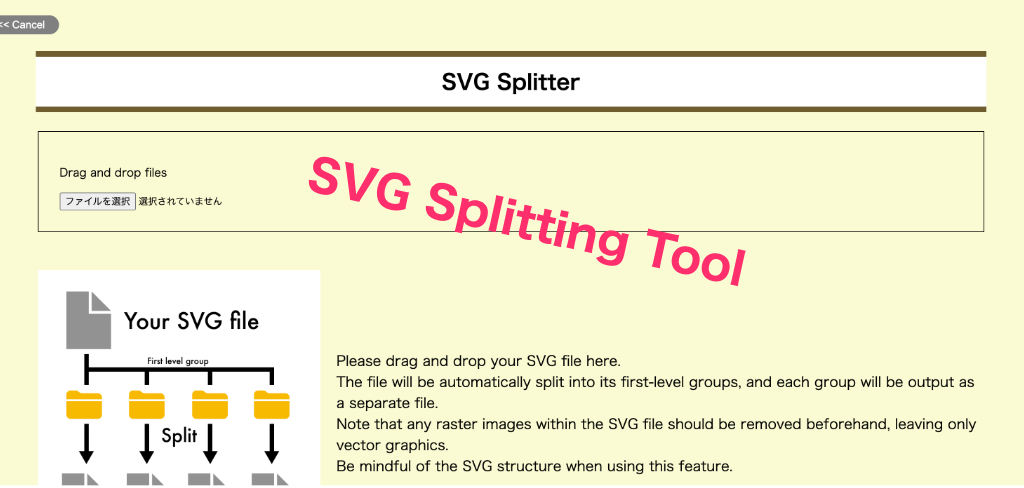
What's SVG Splitter? SVG Splitter is a handy tool that splits the first-level groups of an SVG file and saves them as individual files. |
||
Step.2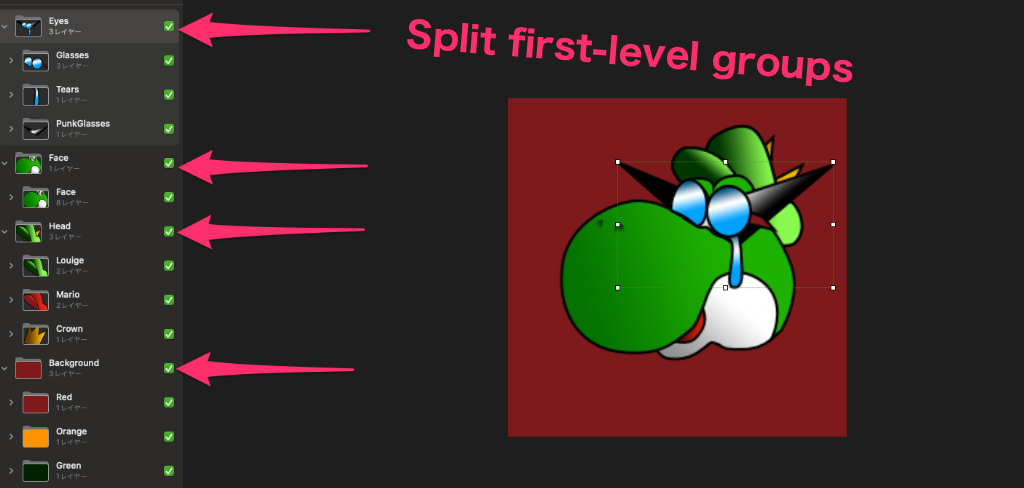
Caution When using this tool, be careful with how you group elements. For example, organizing the first-level groups into layers such as "Body," "Head," and "Face" can be effective. Additionally, making the child elements of the first-level groups into named groups for each part can facilitate your work. For instance, under the "Head Group," you might have subgroups like "Beret" or "Headband" for each specific part. |


Home / Info 
@chun_onchain Website Copyright 2024 ChunOnChain |

